Tag Archives: AI

Building an AI Chess Robot, Part 2: When the Simulation Meets the Real Arm

The simulator got every direction right, and almost everything else wrong.

In Part 1 I made the case for building the whole system inside a digital twin before letting a metal arm loose on a wooden board. The simulator was working, the trajectories were tested and the collision clearances were validated. All that was left was to plug in the real LeArm and let Kit play.

That is not quite how it went. The short version: the simulator got the direction of every joint right and almost everything else about the real world wrong. The sizes, the heights, the claw, even which USB device the arm turns up as. This post is the honest account of what survived contact with the hardware, what did not, and why I have decided to bolt a depth camera above the board.

Key lesson: A simulator tells you which way things move. Only the real arm tells you how far, how high and how wide. Plan for a calibration phase, and give the robot eyes.

One More Round in the Simulator

Before plugging anything in, I made the digital twin earn its keep one more time. We had the simulator play ten complete games, two at each of the five experience levels, driven through the real browser UI while recording the screen. An in-page collision audit sampled points on every arm mesh against the board, the graveyard tray, the table, every standing piece and Reachy Mini on every frame, sweeping between frames so a slow render could not hide a hit.

The results were reassuring. All ten games were legal, the 3D board matched the chess engine after every move, the turn lock rejected every human move sent while the arm was busy, and there were no collisions with the board, tray, table or Reachy Mini. (The one game that came back with errors turned out to be me clicking New Game in my own browser halfway through the run. A test rig is only as clean as the person using it.)

Bug 7: The claw closed before it reached the piece. Watching the recordings back, I noticed the claw was almost shut all the way down to the piece. The “open” position I used for approaching was only 1 mm wider than the piece’s neck, which looks fine in a render and is impossible on a real arm. The claw now opens wide while it hovers and descends, closes only once it is at the grasp height, stays closed while carrying, and opens again to release.

The problem simulation could not fix. The audit also showed the claw brushing neighbouring pieces by up to 11 mm on almost every pick. The stock LeArm claw is roughly 60 mm wide and my simulated squares were 18 mm. No amount of software fixes that. It was the first hint that the real board would have to be different from the simulated one, and the real board turned out to be very different indeed.

The Wrong Device and a udev Rule
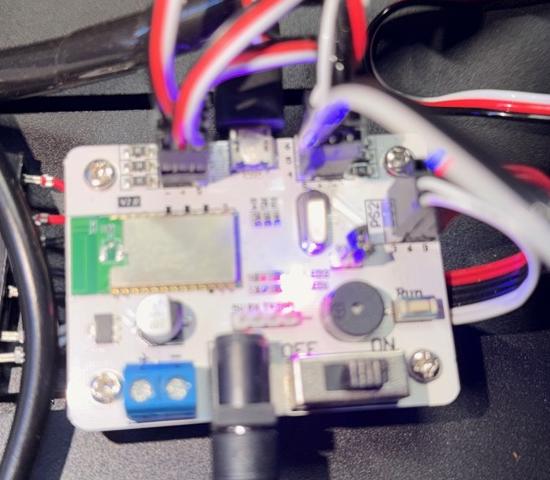
Figure 1: The controller board.

The arm showed up on the USB bus as an HID device called “Hiwonder” (a MindMotion MM32F103RB, USB ID 0483:5750). Before that I had been talking to /dev/ttyACM0, a USB serial port, assuming it was the arm. It was not. It was the controller board inside Reachy Mini. A handful of read-only query bytes went to the wrong robot before we noticed. It shrugged them off, but it is a good reminder to check what you are talking to before you send it anything.

Linux made the HID device root-only, so a one-line udev rule fixed the permissions:

SUBSYSTEM=="hidraw", ATTRS{idVendor}=="0483", ATTRS{idProduct}=="5750", MODE="0666"

The protocol is delightfully simple: 64-byte HID reports that start with 55 55, then a length and a command. Command 15 reads the battery voltage and command 3 moves servos with a duration, so every move carries its own speed. The first thing the arm ever said back to me was 7.7 V. It felt like a handshake.

One Servo at a Time

With real servos under my fingertips, I did not run the planner. I moved one joint at a time, in slow small steps, and described to Claude what I saw and heard after each one. It sounds painfully slow, but it is the only safe way to learn what a mechanism actually does.

The good news: every direction matched.

ServoJointLarger pulse moves it…
6Base panto the left
5Shoulder liftforward, toward the board
4Elbowbackward
3Wrist flexbackward
2Wrist rollto the left
1Clawclosed

Every one of these agreed with the URDF axes from Part 1. The sign fixing from Bug 1 paid off: the geometry in the digital twin really is the real arm’s geometry. Sending 1500 to the lift, elbow, wrist flex and roll stood the arm perfectly upright, which is exactly what the simulator calls zero.
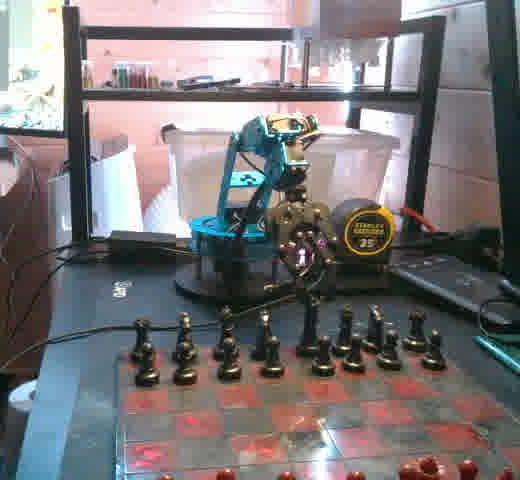
Figure 2: The laptop webcam’s view of the rig. It turned out to be a very useful pair of eyes.

The bad news: the claw. The simulator assumed a claw that opens to about 90 mm at pulse 1100 and closes around 1750. The real claw is nothing like that:

WhatSimulator assumedReal arm
Fully openpulse 1100, about 90 mm gapabout 1450, roughly 2 inches (50 mm)
Open end stopnot modeledclicks violently at 1250. Never go below about 1400
Closinglinear, done by 1750the gap barely changes until about 1900, then closes to about 2400
Grip on a pawn’s neckabout 1620about 2350

Key lesson: If a servo is clicking, it is pushing against an end stop and chewing its gears. I only found the open limit because I was stepping slowly and listening. Back off at the first click, and put a hard clamp on every servo in the driver.

The driver now clamps the claw to 1400-2400, and it refuses to move any servo whose safe range I have not measured.

The Board Is Too Big for the Arm

Then I put a real chessboard in front of the arm: 12 inches across, with 1.5-inch squares and the near edge 5 inches from the centre of the base. Those squares are twice the size of the simulator’s, which is great news for a claw that is 60 mm wide. The bad news is reach.

The LeArm can stretch about 290 mm from its base at table height. The far edge of the board is 432 mm away.

rank 8  ########   reachable (black side, nearest the arm)
rank 7  ########   reachable
rank 6  ########   reachable
rank 5  .######.   reachable except the a and h corners
rank 4  ........   out of reach
rank 3  ........   out of reach
rank 2  ........   out of reach
rank 1  ........   out of reach

Moving the board closer does not help, because the arm also cannot grasp anything much nearer than about 100 mm from its base. For this arm, a full game needs a board with squares of about 24 mm, and pieces to match. For now I have kept this board and let Kit work on black’s half only. That is enough to calibrate pick and place and to start training, even though it is not enough for a full game.

First Real Pick and Place

Pulse 1500 on the base pointed the arm 90 degrees away from the board. The base servo only travels about 90 degrees either way, so this could not be fixed in software without putting half the board out of range. I switched the board off and physically turned the arm’s base a quarter turn.

After that came the process I now think of as “go down a little further”. We hovered the claw above the black king, lowered it in 5 to 10 mm steps, and I told Claude what I could see. A lot of what looks like precise calibration in the table below was me saying “close it slightly more” while holding my phone camera over the board.
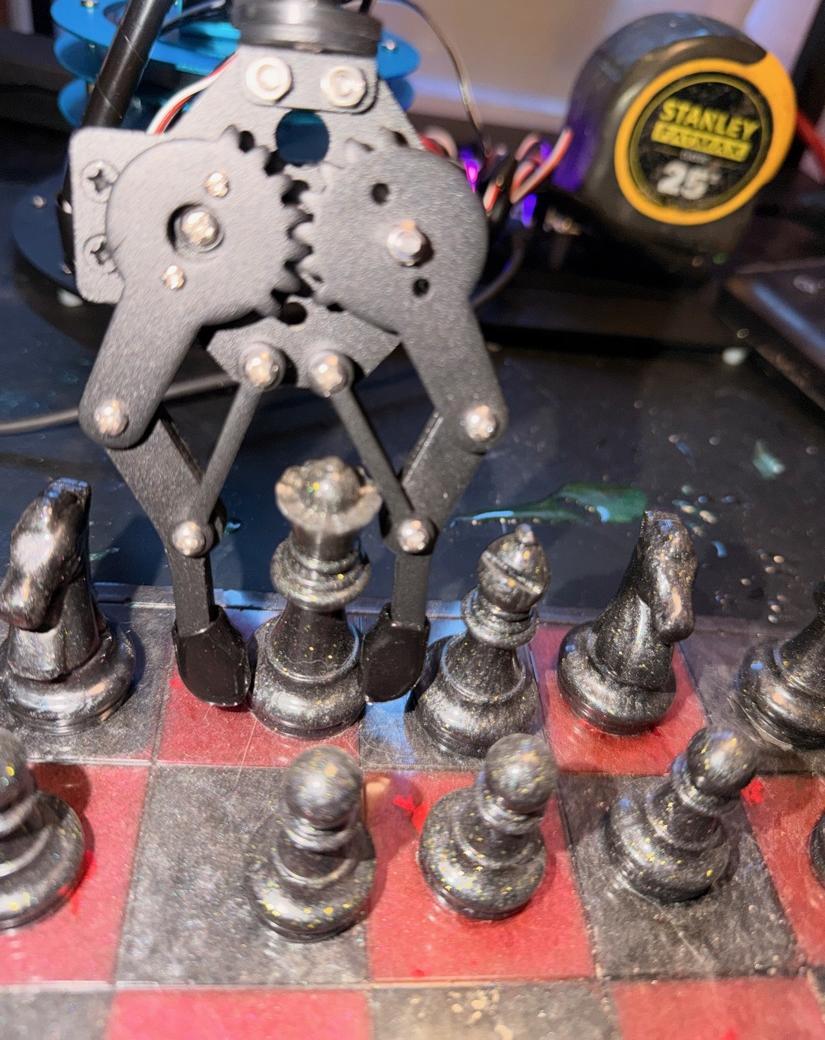
Figure 3: Pads on the king’s base. Too low.
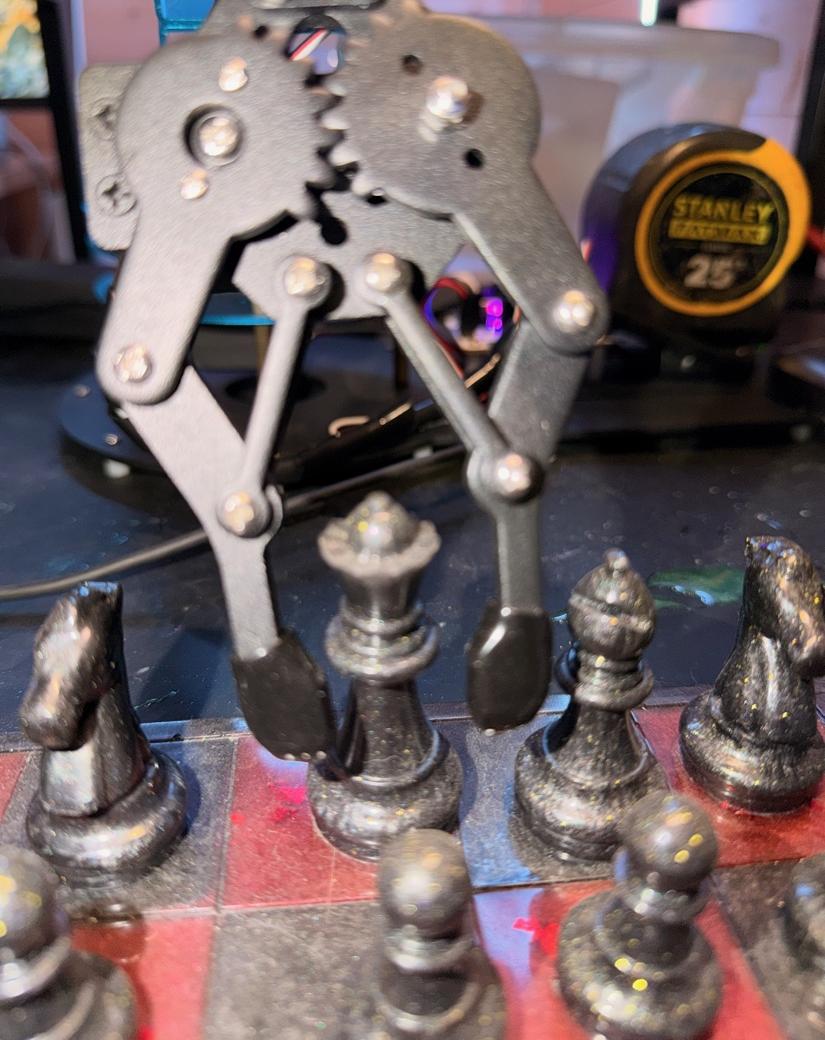
Figure 4: Pads on the stem. Closer, but loose on one side.

Three things went wrong, and each one gave us a number:

  • My estimate of how high the board sat relative to the arm was off by close to 100 mm. A photo of the pads sitting on the king’s base gave the real figure.
  • A grip height that suits the king (pads 20 mm above the board) scraped the top of the pawn. Pawns need the pads at 12 mm, the lowest I will let the arm go.
  • The claw’s approach opening has to fit between neighboring pieces. At 50 mm the pads hit the pieces on either side, so I narrowed it to roughly 20 mm for the descent.

Then the king came up in the claw, level and firm, and went back down on e8. After the king, a pawn: d7 to d6. The pawn landed about a third of a square too far toward the back of the square. That is a classic open-loop error. Tiny mistakes in link lengths and servo scale add up the further the arm stretches, so each rank farther from the base is a little worse. We applied a 13 mm correction and tried again, and it did not fix it. That is a teething problem for another day. Guessing the error by eye is exactly the kind of thing a camera should do for me, and it is a big part of why I decided to add one.

Measured on the real armValueHow
Pawn / king height38 mm / 64 mmruler
Pad height for a king’s neck20 mm above the boardstepping down, with a photo at each step
Pad height for a pawn’s neck12 mm above the boardsame, after scraping the top once
Claw opening for the approachabout 20 mm (pulse 2230)fits between neighbors
Grip: king / pawnpulse 2380 / 2360closed in steps until firm
Carry heightat least 80 mm above the boardclears the king at 64 mm

Why I Am Adding a Depth Camera

Look at how I calibrated everything above. Every number came from a person standing next to the arm, watching it, and telling a computer what they saw. That works for one pawn on one square. It will not work for sixty-four squares, six piece types, a board that gets nudged and a claw that wears.

The arm needs eyes. I had an Intel RealSense D435 depth camera to hand. I plugged it into the laptop and installed pyrealsense2 in a separate Python virtual environment so I would not disturb the simulator. Within a few minutes I had depth and colour frames. It reports distance in millimetres at 640 x 480 and 15 frames a second, and the first thing it told me was that the surface it was pointing at was 197 mm away.

Why not mount it on the wrist? My first instinct was to fix it above the grip, so it could look straight at the piece. We ruled that out for three reasons:

  • Minimum range. The D435 cannot measure anything closer than about 20 to 28 cm. On the wrist it would be 5 to 15 cm from the piece at the moment I most need to know, and the depth would be blank.
  • Weight. It is 70 to 100 g with its cable, hanging off a small wrist servo at full stretch.
  • The cable. A stiff USB 3 cable pulling on the wrist would disturb the very calibration I am trying to build.

If I ever want a camera on the arm itself, the Intel D405 is designed for that, with a minimum range of about 7 cm.

A fixed overhead camera. So the D435 goes on a fixed stand above the board, 500 mm over the surface, directly above the board’s centre line and 186 mm in front of the base axis, lenses pointing straight down, with the long side of the camera running along the line from the arm to the far edge of the board. At that height the colour camera covers a 687 x 384 mm patch, which takes in the arm’s base and the whole board with a margin. I drew a diagram so I can build the bracket.
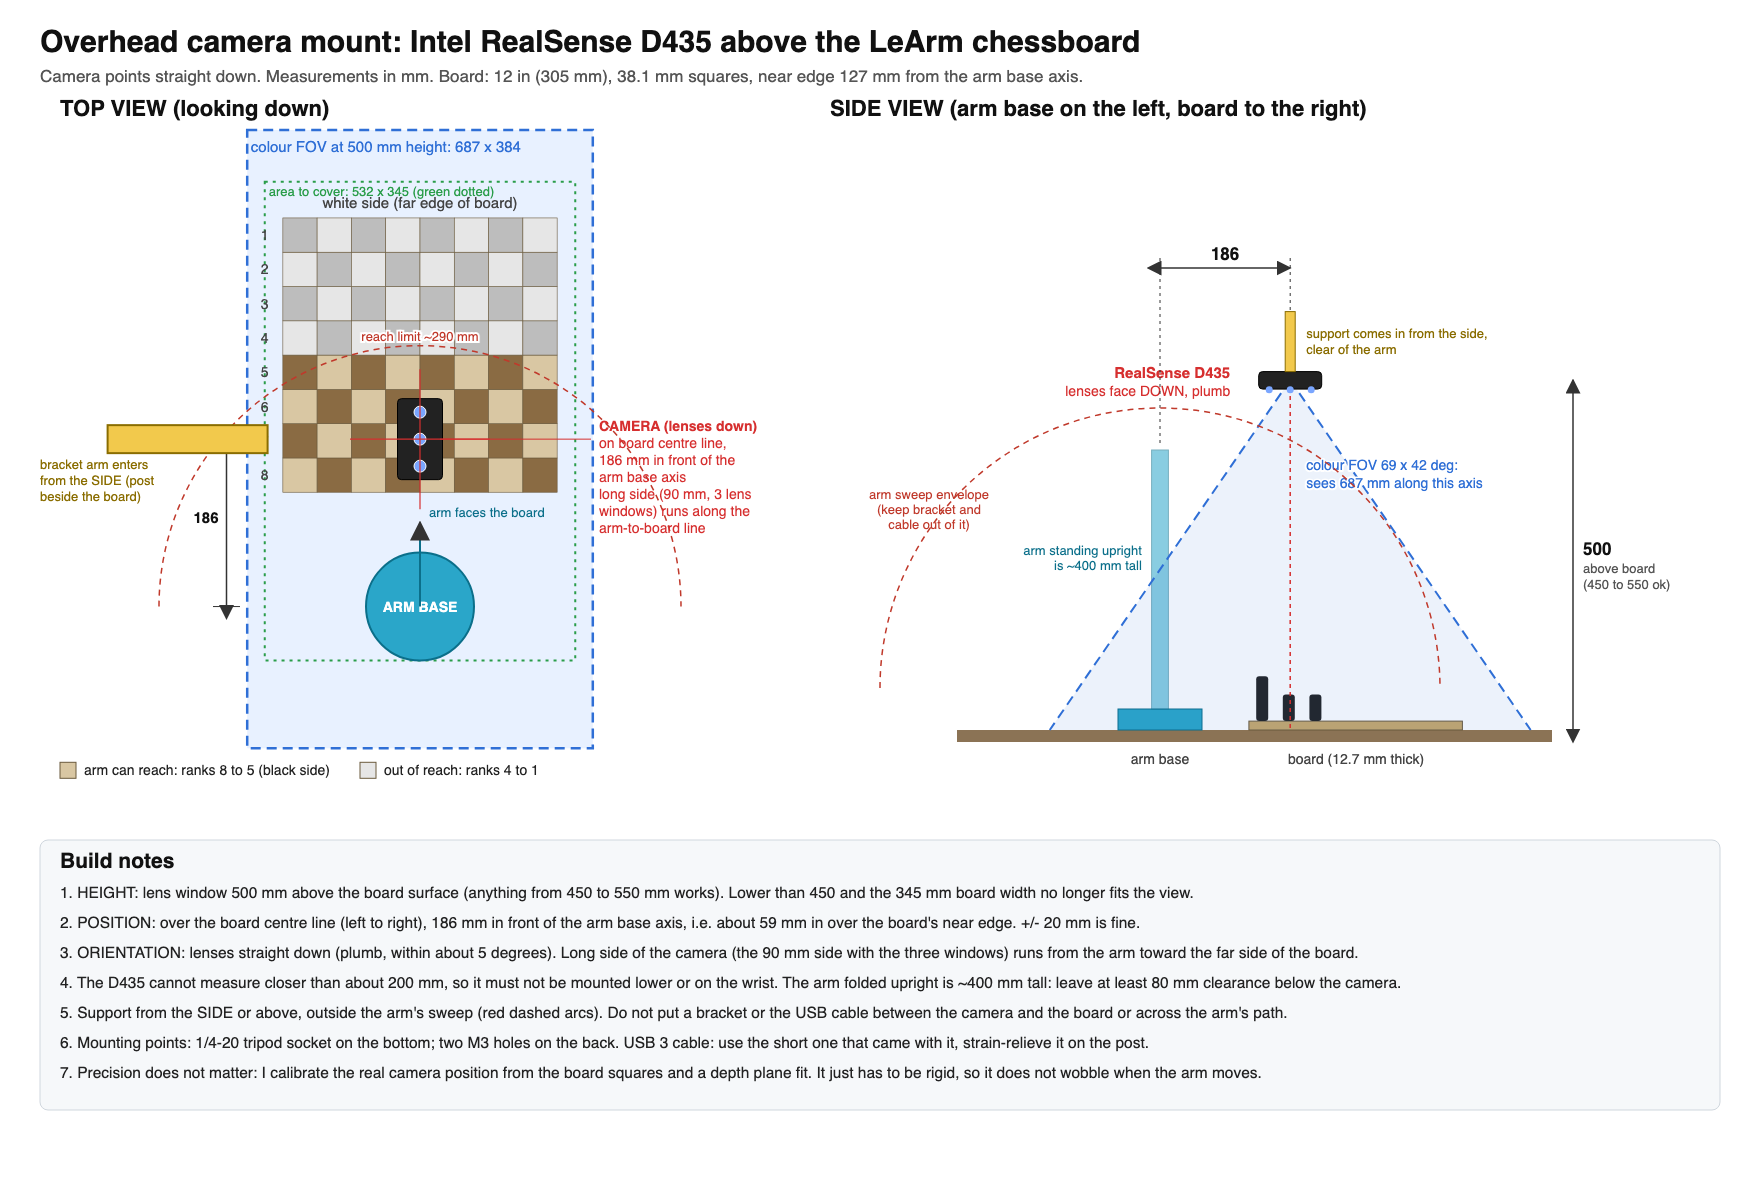
Figure 5: The mounting diagram. 500 mm up, 186 mm in front of the base, lenses straight down, support coming in from the side.

Precision matters less than you might think. The camera will calibrate itself from the squares of the board and a plane fitted to the depth. It just has to be rigid.

A live view in the simulator. Of course it needed a window into the simulator. A small service on the laptop streams the camera over HTTP as MJPEG, and a new box at the top left of the simulator shows it live. It has a toggle between colour and a false-colour depth view, and clicking anywhere on the image reads out the depth in millimetres at that pixel. The service runs under systemd with the same restart behaviour as the rest of the stack, so it comes back when the laptop does. (The only hiccup was a port clash: the one I wanted was already used by Reachy Mini’s software, so it lives on 8790.)
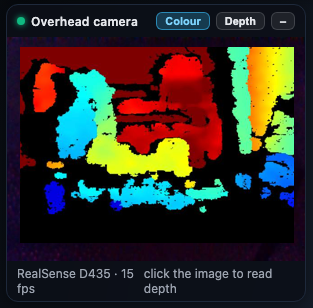
Figure 6: The camera box in the simulator, top left, live at 15 fps.

Here is what I want the camera to do, once it is mounted:

  • Find the board squares in the image and work out the true transform between the camera and the arm, replacing the numbers I tuned by hand.
  • Measure where each piece actually stands and correct the claw position before every grasp.
  • Check the height of the piece top, so the pads stop at the right place for each piece.
  • Later, watch the board to see the human’s moves.

None of that exists yet. Right now I have a camera that reads depth, a window for it in the simulator and a bracket to build.

What Survived and What Did Not

Survived contact with the hardwareDid not
Every joint axis and sign from the URDFThe claw’s open and closed pulses
Pulse 1500 as the upright zero poseThe board size and layout (only ranks 5 to 8 are reachable)
The planner’s structure: hover, descend, grasp, lift, carryEvery hover and grasp height, all re-measured
Piece-specific top graspsPosition accuracy at the far end of the reach
Clamping and stepping as a safety habitAssuming the board and the arm sit at the same height

Lessons So Far

  • Check which device you are talking to before you send it a single byte.
  • Move one joint at a time, in small steps, and listen.
  • Put a hard clamp on every servo in the driver, and refuse to move any servo you have not measured.
  • Measure the claw and the board before you trust the maths.
  • A human with a phone makes a great calibration tool, right up until you need to do it twice.

What Comes Next: Part 3

In Part 3 I will mount the depth camera, calibrate it against the board and let it close the loop: look, correct, grasp. If that works, Kit will play black’s half of a real game on the wooden board. I also need to make a decision about the board: a smaller one so the arm can reach every square, or a different arm.
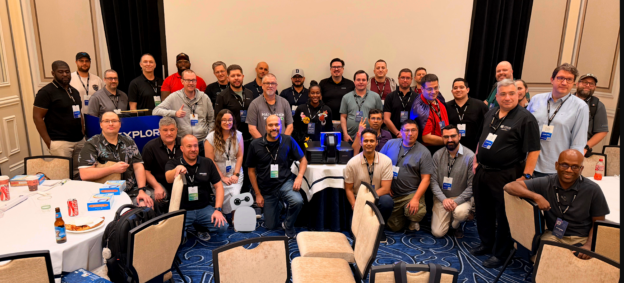
Presenting with a Robot – True Hackathon Style!

Every year at the VMware Explore Hackathon in Las Vegas, we kick off the evening with the usual housekeeping. You know the drill: going over the schedule, explaining how solo hackers get matched into teams, running through the hardware prizes, introducing our guest mentors, and explaining how the judging works. Usually, that means standing on stage with a clicker and talking through a slide deck.

This year, I had Kit, my Reachy Mini robot, sitting on my desk. And whilst there are plenty of fun demos you can run with a robotic head, I thought: why should I do all the talking when I have a robot capable of expressive gestures, speech synthesis, and head tracking?

Why not let Kit present the hackathon opening to the room?

It sounded like a brilliant idea on paper. In practice, making a physical robot co-present on a conference stage in front of a live audience requires a lot more than just piping text into a speech model. The robot needs stage presence. It needs to look at the audience, turn its head to glance at the slide on the big projector screen, execute expressive antenna and head motions, and change the slides automatically at the right moment.

So we built reachy-mini-presenter, an open source presentation app for Reachy Mini. Here is how it came together, what made it work, and what we learned when taking a robot on stage.

See Kit in Action at the Hackathon

Before getting into the code and architecture, here is the live video of Kit co-presenting the hackathon kickoff at VMware Explore 2026:

Hearing a tiny robot announce to a ballroom full of developers that it was my virtual robotic slave, introduce Bob Plankers, warn everyone that they will be judged, and hand back to its human overlord set exactly the right tone for the evening.

What It Takes to Share a Stage With a Robot

Giving a speech through a robot is easy if you do not care how it looks. You send an audio stream to a speaker and let the robot sit there motionless. But that completely defeats the point of using an embodied robot.

To feel like a genuine co-presenter on stage, the system had to solve four key problems:

  • Keep the slides on the big screen in lockstep with the spoken audio without requiring a human to hit a clicker.
  • Synchronise physical head gaze and antenna emotions to the exact words being spoken.
  • Fit naturally into standard presentation workflows so anyone can write or edit a deck in Google Slides, PowerPoint, or Markdown.
  • Run reliably in a convention centre environment where venue Wi-Fi is notoriously unpredictable.

If any of those pieces fail, the illusion breaks immediately.

The Speaker Notes Are the Script

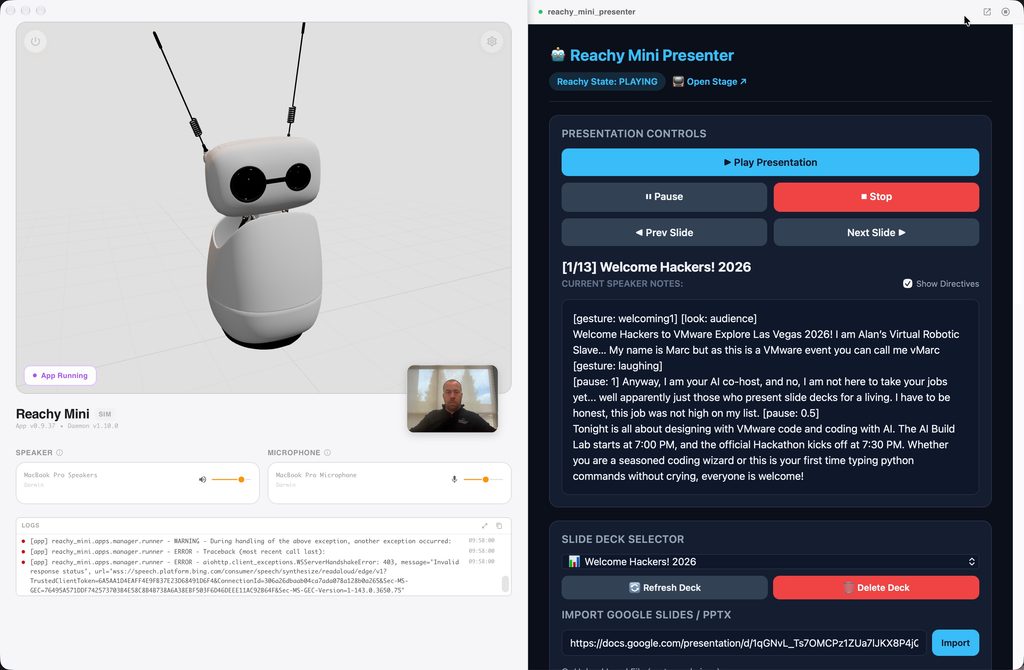
The biggest breakthrough in the design was deciding where the robot directives should live. We did not want a complex external timeline editor or a custom visual choreography tool. Presenters already write their scripts in speaker notes.

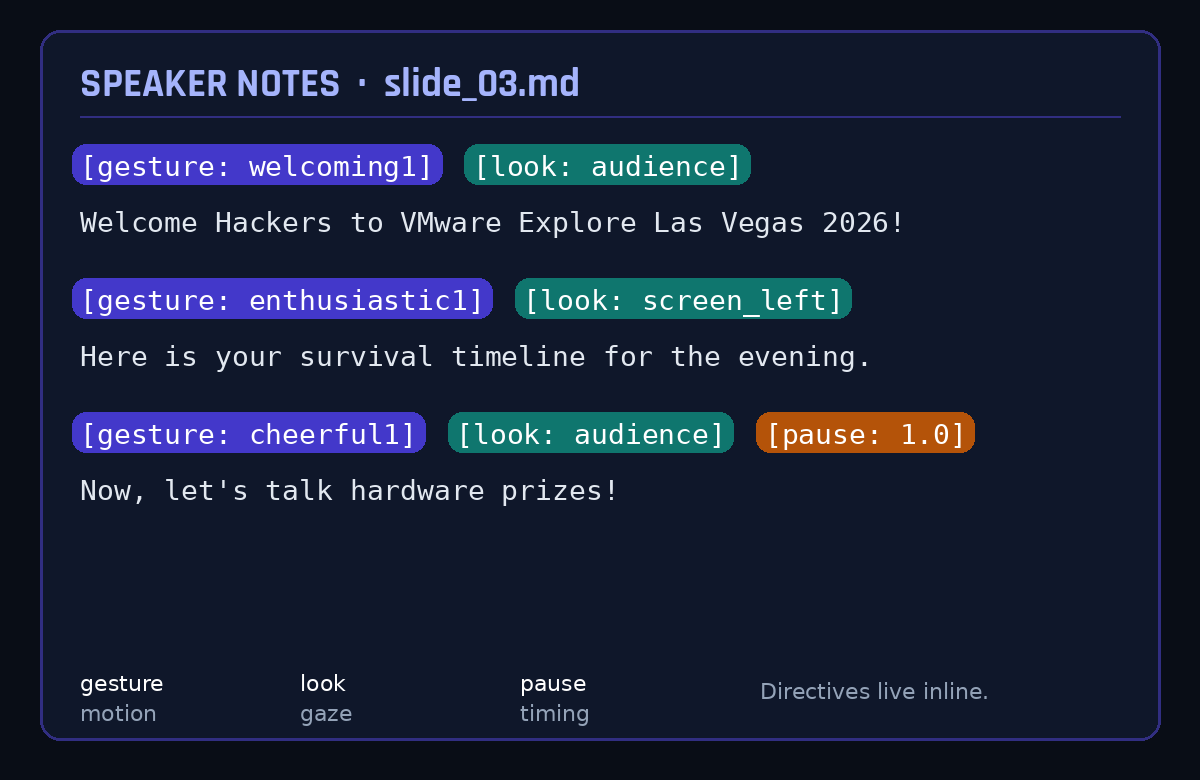
So we turned speaker notes into a stage script by supporting inline directives. You write your normal notes, and sprinkle in robot commands using brackets:

The parser extracts these directives on the fly:

  • Gaze orientations orient the robot head dynamically toward the audience or the presentation screen.
  • Expressive motion gestures trigger Pollen Robotics recorded move trajectories.
  • Timing pauses let the robot wait for audience laughter or applause before resuming speech.
  • Head wobbles and antenna drift run continuously during speech to mimic natural human speaking cadences.

When Kit referenced the timeline slide on the projector, it turned its head toward the screen on its left, delivered the line, and then turned back to face the audience. That single behaviour transformed it from a talking speaker into a presenter.

Under the Hood: Three Pieces, One Show

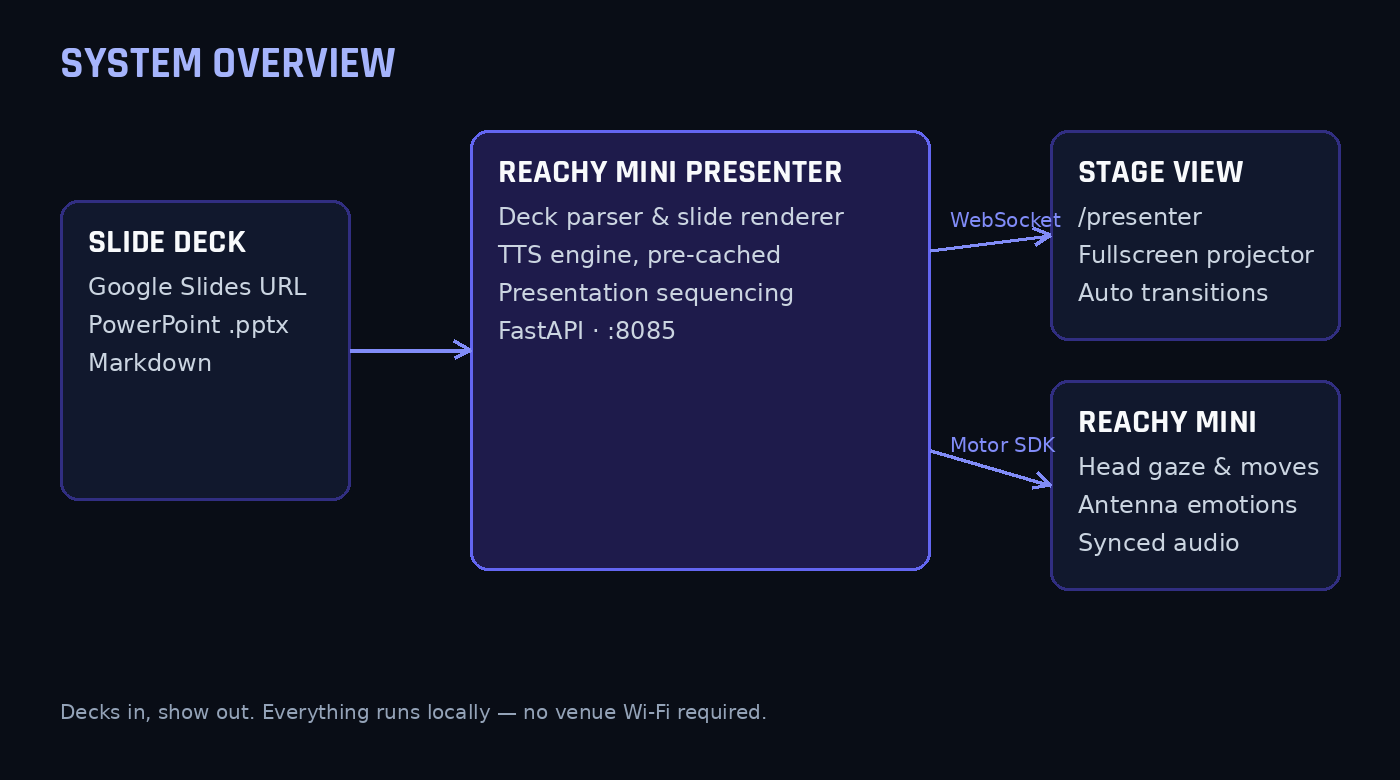
The application runs as a local FastAPI service that integrates natively into the Reachy Mini desktop application ecosystem.

The design separates presentation into two browser views:

  • The presentation stage view at slash presenter is projected onto the conference hall screens, showing high-resolution rendered slide graphics that transition automatically via WebSockets.
  • The control dashboard view at the root URL runs on the operator laptop, providing slide thumbnails, live speaker note previews, playback controls, and manual gesture triggers.

For deck ingestion, we built support for Google Slides, PowerPoint files, and Markdown. For Google Slides, you simply paste the presentation share link into the dashboard. The app fetches the deck, parses the shapes and notes, renders high-resolution slide images using LibreOffice or Keynote CLI, and caches everything locally.

The Golden Rule: Never Trust Venue Wi-Fi

If you take only one lesson away from this post, let it be this: never rely on real-time cloud text-to-speech during a live stage presentation.

Conference Wi-Fi in a room packed with hundreds of engineers is always a gamble. If an API call stutters or drops packets, the robot freezes mid-sentence, the slide does not advance, and everyone stares at an awkward silent robot.

To avoid this, reachy-mini-presenter pre-renders and caches every spoken phrase locally as WAV files before the presentation starts. We supported local neural voices via Kokoro and Edge TTS, along with cross-platform native audio playback engines:

  • macOS uses the native afplay utility.
  • Windows uses the low-level Windows multimedia MCI sound subsystem.
  • Linux uses ffplay or mplayer.

Because the entire audio pipeline is cached locally on the laptop before walking onto the stage, the presentation runs with zero network dependency during the actual talk.

Stage Fright: Notes From a Live Robot

Putting hardware on stage always delivers a few surprises. Here is what we had to debug:

  • Audio levels in an exhibition hall need serious headroom because a desk speaker that sounds loud in an office is virtually inaudible in a hall with several hundred people talking. We ended up with a strategicly placed mic hooked directly into the venue sound system.
  • Motor kinematics limits triggered warnings during fast transitions when moving between an extreme look-up pose and an enthusiastic celebration gesture in one frame, which we smoothed out with easing curves.
  • Comic timing requires deliberate pause directives because in early dry runs the robot steamrolled straight through punchlines without waiting for the room to laugh. Inserting explicit one-second and two-second pause directives after jokes allowed room for audience reaction before the next slide loaded.

Your Turn: Run It Yourself

The best part about the Reachy Mini ecosystem is that you do not need to clone git repositories or mess around in a terminal to get this working.

If you have a Reachy Mini, you can install and run the app with one click directly inside the official Reachy Mini Control desktop app. Open the app catalog in Reachy Mini Control, search for Reachy Mini Presenter, and hit install. It downloads into the robot app environment and launches right from your dashboard.

I also created a dedicated website for the project on Hugging Face Spaces:

Reachy Mini Presenter on Hugging Face

The site includes an interactive preview showing how the robot moves and reacts to slide directives, a full reference for speaker note tags, and a catalog of supported gestures.

Once you launch the app, you will have two interfaces ready to go:

  • The control dashboard at http://localhost:8085/ lets you load decks, review speaker notes, and drive the presentation.
  • The presentation stage at http://localhost:8085/presenter goes onto a projector or secondary display to show fullscreen slides that advance automatically in sync with the robot.

If you want to poke around under the hood, tweak the Python code, or add custom animations, the source code is completely open on the Hugging Face Space repository as well.

Wrapping Up

Building reachy-mini-presenter was one of the most rewarding robotics projects I have worked on recently. It took Kit from being an interesting desk gadget to an active, helpful participant in a major community event. The reaction from the room at VMware Explore was incredible, and seeing developers laugh and cheer as a robot explained hackathon rules made all the late-night motor tuning completely worth it.

Give it a spin with your own slide decks, experiment with the speaker note directives, and let me know what you build!

The hackathon overall was a great success and always one of my favourite sessions at VMware Explore, thanks to everyone who attended and the winners of prizes, some awesome innovations were created as always!

Giving Muse a Body: Connecting a Reachy Mini Over Tailscale

Recently I have been messing around with Kit, my Reachy Mini, on my desk, and whilst there are plenty of ways to make a robot talk, that was not really the point. I wanted to talk across the room to the same Muse (Meta AI) that already knows my calendar, my email and my house – and hear it answer back through the robot. Sounds simple, right? Let me tell you, it was not. But it works like a charm now, so I thought I would share how we got there, including the design we threw away.

What “connected” had to mean

A quick demo is easy, I have seen plenty of them. You pipe a microphone into a model and play back whatever comes out. That was not what I wanted. The reply had to come from my actual Muse agent – with its memory, its Gmail and calendar connections and its knowledge of the house – not a raw model starting cold every time. And it all had to stay private: no robot API exposed to the internet, no audio leaving the house except as a transcript, and definitely no robot shouting out loud when I am away or asleep.

Get those three things right – same agent, local audio, private transport – and, honestly, the rest of the design pretty much falls out of them.

First, I went down the wrong route

My first thought was the obvious one, it is what I would normally do. Sparky, my existing local voice stack (thanks to Alexis Gallagher), would just call an OpenAI-compatible chat endpoint and get Muse’s replies back. Well, that falls over pretty quickly here, and it is worth understanding why. The Meta Model API is OpenAI-compatible, but it serves raw models. A raw model has no access to my Muse agent’s memory, calendar, email or tools, so the answers would have sounded perfectly plausible whilst knowing nothing that actually matters.

On top of that, Muse has no inbound endpoint that a server in my house can push utterances to. So we flipped it round: instead of Sparky calling Muse, Muse would poll Sparky. That one reversal is basically the whole architecture. Everything else is just plumbing around it.

Let Sparky own the audio – RIP bridge.py

Next I tried writing a standalone script – bridge.py – to do the whole job itself: talk to the Reachy daemon, grab the microphone, transcribe everything and play the replies. It did not last long. Sparky already owned the audio device exclusively through PortAudio, and the Reachy daemon was deliberately running in no-media mode. Two processes fighting over the same device was never going to end well.

So bridge.py was retired on 18 October 2026, and I let Sparky keep every audio job: capture via PortAudio, wake and turn detection, Faster Whisper transcription on the GPU, and Kokoro text-to-speech at 24 kHz feeding the robot’s head animation and lip-sync. Muse’s side starts at the transcript and ends at the reply text. Much simpler, and nobody is fighting over the hardware.

Two channels over Tailscale, nothing open to the internet

The robot itself, “Kit”, is a Reachy Mini Lite, USB-tethered to my Alienware m15 Linux box. That same box also runs OpenClaw in a container. The Muse Voice Link bridge runs on there too, bound only to its Tailscale address, 100.81.48.19 on port 8422. Muse’s machine is on the same tailnet at 100.109.159.50. Plain HTTP is fine inside that link because Tailscale’s WireGuard transport is already encrypting it – but only if the bind is honest. I checked with ss -tlnp that nothing was listening on 0.0.0.0:8422.

KIT – REACHY MINI LITE (USB)
microphone array · speaker · head movement
↓   USB   ↓
SPARKY – Alienware m15, 100.81.48.19:8422
PortAudio · Faster Whisper (GPU) · Kokoro TTS
utterance queue · presence and quiet-hours checks
↓   Tailscale / WireGuard   ↓
MUSE AGENT – 100.109.159.50
long-poll hook · memory · calendar · Gmail · tools
ChannelEndpointJob
1. Replies and alerts
Muse to Sparky
POST /api/alertDeliver text for Kit to speak, with flags that decide announcement style and phone fan-out.
2. Utterances
Sparky to Muse
GET /api/utterances?wait=30
POST /api/utterances/ack
Expose a long-polled queue of transcripts. Muse takes custody, acknowledges, and thinks in its own time.
HealthGET /healthReturns the bridge identity so either side can prove the link before blaming the audio.

Note: Bind to the tailnet address, then actually prove it. If it is listening on every interface, it is not private, however much you tell yourself it is.

The conversation protocol

A queue, an ack, and a bit of patience

Here is the bit you have to get your head around: voice feels instant, agents are not. A Muse turn takes tens of seconds – waking the agent, loading context, sometimes calling tools, then actually answering – roughly 15 to 45 seconds depending on what you asked. If you try and hold the microphone turn open for all of that, it just feels broken. So we did not.

How one turn flows

  1. Listen locally. After the wake phrase, voice activity detection and turn detection find the end of the utterance. Faster Whisper transcribes it on the GPU.
  2. Enqueue and reassure. Sparky appends the transcript, with a UUID and timestamp, to an in-memory queue, plays a short filler – “Let me check.” or “One moment.” – and closes the mic turn.
  3. Long-poll, do not busy-poll. Muse’s hook holds GET /api/utterances?wait=30 open. The request returns the moment something is queued, or an empty list on timeout, and the poller reconnects at once.
  4. Ack on receipt, not on reply. Muse acknowledges as soon as it takes custody. A slow answer can then never cause the same utterance to be delivered twice.
  5. Reply as a separate POST. The finished answer travels back through Channel 1 and Kit speaks it. Arrival of that POST cancels the watchdog.
POST /api/alert
{
  "title": "Sparky reply",
  "message": "Full text of the reply.",
  "spoken_text": "Concise spoken version.",
  "is_reply": true,
  "notify_chat": false
}

The queue is deliberately bounded: 50 entries maximum, and unacknowledged items expire after one hour. If no reply arrives within 120 seconds, Kit speaks a fallback – “Sorry, I didn’t get an answer – try again?” – rather than leaving you hanging in silence. We ran twenty bridge and microphone tests on the local side before the first real turn, which I would recommend, because once this goes across the room you want to know which bit actually broke.

Authentication · Manners

The auth bit nearly stopped us

The bridge started out doing everything properly, with a conventional bearer token, and the health check behaved exactly as designed: 200 with the token, 401 without it. I was pretty pleased with that, until we hit a problem no amount of server code could fix. Muse simply had nowhere sanctioned to hold that token for this connection. The credential vault would not register a tailnet IP address – or a sslip.io alias for it – as an API host, because neither is a public DNS hostname. Hook scripts, meanwhile, run without secrets by design.

So we stepped back and used what Tailscale already gives you. The socket is bound only to the tailnet interface, and every peer on a tailnet is cryptographically authenticated by WireGuard before a packet even arrives. We changed the three bridge endpoints to trust tailnet peers, with no bearer token needed. Now, be clear about the trade-off if you do this yourself: any device you let onto your tailnet can reach those endpoints. For my personal tailnet that was the right call. For a shared or work tailnet, it absolutely would not be.

Within about an hour that afternoon the first live voice turn completed end to end, and a separate test confirmed it was actually coming out of the robot’s speaker. That was a good moment.

Replies and alerts are not the same thing

KindPayload signalsBehaviour
Voice replyis_reply: true, notify_chat: false, title “Sparky reply”Spoken directly through the voice pipeline. No WhatsApp copy – you just heard it, your phone does not need it too.
Proactive alertis_alert: true, notify_chat: true, a descriptive title, a short spoken_textAnnounced as “Incoming message from Muse”, then spoken – and fanned out to WhatsApp via OpenClaw.

Both kinds pass the same gates before anyone hears anything. Sparky checks Home Assistant presence – am I actually home? – and quiet hours, 10 p.m. to 7 a.m. Fail either check and the speech is suppressed. And I only route a turn to Muse at all when I explicitly say “Ask Muse” or “check with Muse”; Sparky handles everything else locally. Without those manners, let me tell you, this is just a much louder notification problem.

For the icing on the cake – the avatar

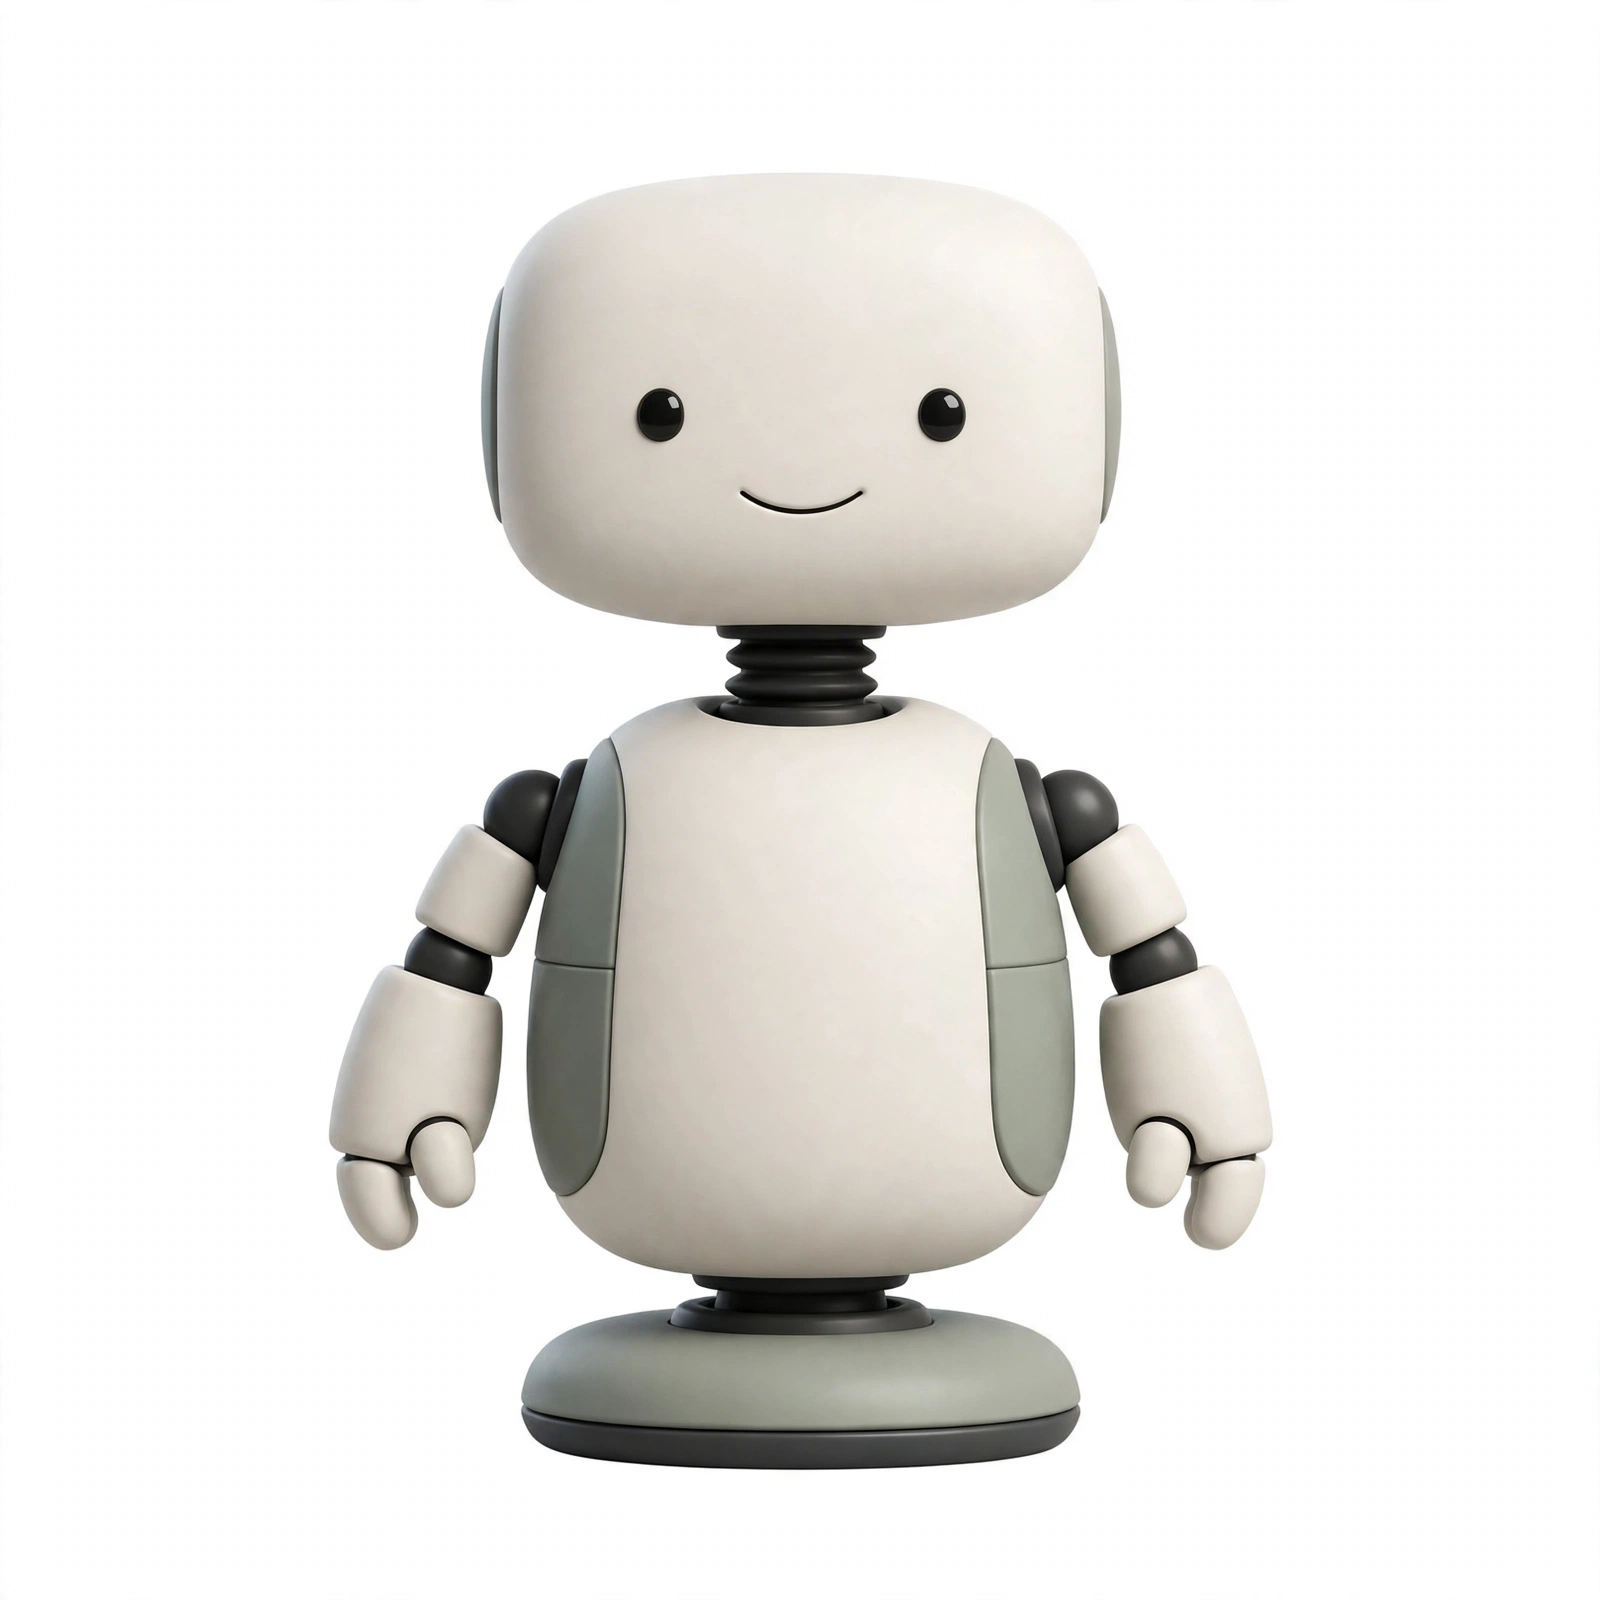
Kit, the Reachy Mini robot-inspired avatar for Muse

A day before the voice link went live, I changed Muse’s avatar to a Reachy Mini robot-inspired look – the second of the options we generated. I know, it sounds cosmetic, and mechanically it is. But it really did close the loop: the face on screen and Kit, the robot on the desk, is now obviously the same character. When Kit says “Incoming message from Muse”, there is no translation step about who is speaking. If you build this, do that bit deliberately too – pick one name, one look and one routing phrase, and keep them consistent everywhere.

What broke (because something always does)

  • Ambiguous success. The bridge can return {“ok”: true, “spoken”: false, “reason”: “delivered”} – delivered, but not spoken, usually because a presence or quiet-hours gate intervened. Log the reason, or you will debug a speaker that was never asked to speak.
  • Intermittent alert POSTs. Early on, /api/alert occasionally hung or returned empty before succeeding on retry, while utterance polling stayed stable. Budget for retries on the speaking path.
  • A dead microphone. Later that same day the link went one-way: it could speak but not hear. One-way is a useful failure state – alerts still work – but only if you notice. A periodic mic check belongs in any serious version.
  • A spoken fact that was wrong. A test alert repeated an incorrect family detail aloud before I corrected it. Speech is harder to unsay than text is to edit, so the bar for speaking a fact should be higher than for showing it.

Build yours – in this order

  1. Start the Reachy daemon in no-media mode, USB-tethered, and let one local stack own PortAudio.
  2. Stand up Whisper and Kokoro locally and prove the audio loop with no agent involved.
  3. Join both machines to one tailnet. Bind port 8422 to the tailnet address only; verify the bind.
  4. Implement POST /api/alert with presence, quiet-hours and notify_chat handling. Test speech before dialogue.
  5. Add the utterance queue: long-poll, ack-on-receipt, 50-entry cap, one-hour expiry, filler on enqueue, 120-second fallback.
  6. Decide auth consciously: a holdable credential if your agent platform offers one, or documented tailnet trust if it does not.
  7. Wire a poller that wakes your agent, then run one live turn and one proactive alert before declaring victory.

And that is it. It is slower than a smart speaker, and far more useful: Kit, a robot I can ask across the room, which answers as the assistant that actually knows my day – and, just as importantly, stays quiet when it should. So get yourself a test setup, just play with the audio loop first, they will soon start to make sense. Do not wait, this is not one of those things to put off until tomorrow.